


How to Knit Continuous Button Bands with Mitered Corners [TUTORIAL]

Picking up stitches for button bands is a finishing step that many knitters dread. But what if you could knit button bands with the structure of a picked-up band while avoiding some of its biggest drawbacks?
In this blog post you'll learn how to knit continuous button bands with mitered corners. The three benefits of this approach — minimal stitch pick-up, neat transitions, and square corners — allow you to knit cardigans with a clean finish.
Comparing Button Band Approaches
There are of course many ways of doing button bands on hand-knit garments. I won't go into all of them in this post but the two most-common approaches are:
work-as-you-go button bands: working the button bands with the edge stitches in the same direction and at the same time as the rest of the garment
picked-up button bands: picking up stitches after the rest of the garment is finished, then knitting button bands perpendicularly to the garment
Let's take a look at these two approaches in more detail.
Work-as-you-go Button Bands
These days, many knitters want to knit everything as seamlessly as possible, avoiding any finishing work. Work-as-you-go button bands are easy for this reason: once the body of the garment is done, it's done. There's no finishing work to go back to. The transition from neck band to button bands is smooth because it's (often) the same stitch pattern all the way.

But with this approach the stitch pattern used for the button bands needs to be chosen carefully. It should have a tighter row gauge than the rest of the garment, otherwise the bands will start rippling when worn. For instance, Rockweed has built-in garter stitch button bands with i-cord edges.

On Scattershot, on the other hand, the edge stitches are done in double knitting. Both stitch patterns are meant to pull in significantly so that when the garment is blocked, the button bands should be of the right length.
Picked-up Button Bands
While work-as-you-go button bands are knitter-friendly, they often turn out either too flimsy or too tight. That's why picked-up button bands are my favorite of the two approaches: they give both structure and a polished finish to the cardigan. It's easier to adjust the tightness of the button bands with the right pick-up ratio and a smaller needle size than by relying on a stitch pattern to do the job. But they're not without drawbacks, either.

First, you need to pick up stitches for the button bands separately for the right and the left front edge, and sometimes even around the neck line. That means at least two, often three separate pick-ups... and more ends to weave in! Second, there's an abrupt visual change at the junction where the horizontal ribs of button bands meet the vertical ribs of the neck band.

And third, at the ends of the button bands you tend to get what Patty Lyons calls a "swoosh and roll": a little divot in ribbing where the edge-most stitch rolls and dips to the wrong side of the work. What were supposed to be square corners aren't exactly straight. It's particularly annoying when this happens at the tops of the button bands where it's in plain view.
A Third Option: Continuous Button Bands
This brings us to the topic of today's blog post: continuous button bands. They are a mash-up of the two approaches presented above, a way to get the structure of picked-up button bands while avoiding the disadvantages.
no separate pick-ups: stitches for the button bands are picked up only once, in one fell swoop up the right front, around the neck, and down the left front
no abrupt visual change: mitered corners at the top corners give a smooth transition from horizontal to vertical
no distortion at the top: the tops of the button bands are blocked into crisp right-angle corners with truly straight edges

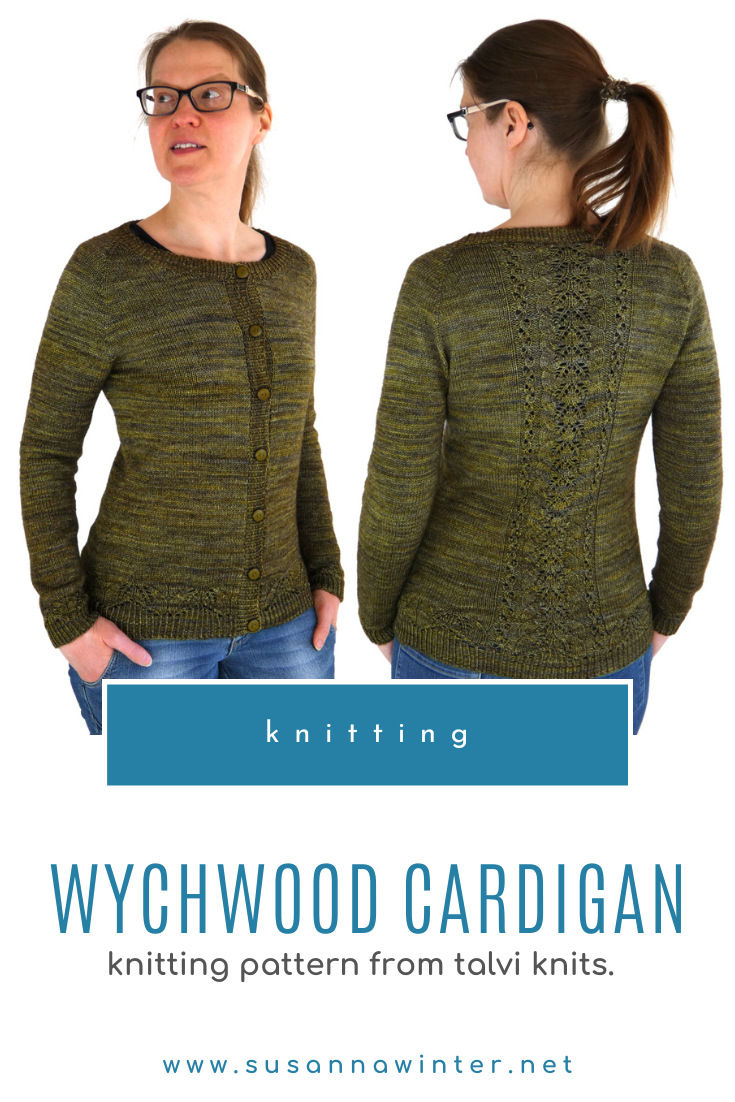
This approach is used in some of my designs: the henley neck of Lyrides and Draconides, and more recently, the full-length button bands on Wychwood Cardigan.
The shaping technique itself is surprisingly simple. It all comes down to paired increases worked on either side of a central corner stitch.
... And How to Knit Them
1. Pick Up Stitches
The first step is to pick up stitches along the front edges and around the neckline. Below, I have a little mock-up of a cardigan with a scoop neck. I'm doing 1×1 twisted ribbing for this demo, and to make the ribbing mirrored and symmetrical, I'm picking up an odd number of stitches in total. (For 2×2 ribbing you'd need a stitch count that's divisible by 4+2.)

Starting from the bottom of the right front, pick up an even number of stitches along the right vertical edge, one stitch from the right corner, an odd number around the neckline, one stitch from the left corner, and again an even number down along the left vertical edge.
Note that in knitting patterns left and right are always seen from the wearer's perspective. That's why the right front is on the left in the above picture and left front is on the right.

If we were to just work ribbing as is without shaping, the top of the button bands would pucker because there wouldn't be enough slack to go around that corner. That's why we need shaping: mitered corners are used to neatly turn a 90-degree angle corner while maintaining the ribbed pattern.

2. Mark Corner Stitches
After you've picked stitches for the button bands, mark the corner stitches with locking stitch markers. These will be the centers of your mitered corners.
3. Start Ribbing
From the WS, establish the rib pattern:
Set-up row 1 (WS): (P1 tbl, K1), repeat to last st, P1 tbl.
Make sure that — when viewed from the right side — the corner stitches are worked as K1 tbl. This should be no problem if you picked up the right number of stitches in the first step.
4. Work Mitered Corners with Paired Increases
Mitered increases are now worked at the corners so that they fan out diagonally on either side of the central stitch. If you were very diligent, you'd first calculate the increase rate for the miter. The calculation involves stitch-to-row gauge ratios — June Hemmons Hiatt gives instructions for this in The Principles of Knitting (second edition, p. 517) — but you can cut a few corners here... pun intended.
What I've found is that, for ribbing, one stitch increased on every other row on either side of the corner stitch is a good approximation. Plus, it's easy to remember: always increase on right-side rows, wrong-side rows are rest rows.
Since the button bands are worked in 1×1 twisted ribbing, I need to work my increases also in the ribbed pattern, alternating knitwise and purlwise increases. This disrupts the pattern as little as possible.

Row 1 (RS): *(K1 tbl, P1), repeat to marked corner stitch, M1R, K1 tbl, M1L, P1, repeat from * once more, (K1 tbl, P1), repeat to last st, K1 tbl; 2 sts increased.
Row 2 (WS): Knit the knits and purl the purls through the back loop.
After every row 1, the rib pattern is briefly interrupted: you'll inevitably end up with three knit stitches back to back with the corner stitch in the middle.

But no worries: balance is restored on row 3 when new purl stitches are added on each side of the corner stitch.
Row 3 (RS): *(K1 tbl, P1), repeat to 1 st before marked corner stitch, K1 tbl, M1RP, K1 tbl, M1LP, repeat from * once more, (K1 tbl, P1), repeat to last st, K1 tbl; 2 sts increased.
Row 4 (WS): Knit the knits and purl the purls through the back loop.
As a result, the rib pattern branches out toward the right and left from that central corner stitch.

Repeat these four rows until the button bands measure the desired length. If you want a buttoned cardigan, add buttonholes on the (wearer's) right button band roughly halfway through. Here I've worked two repeats of the mitered increases for eight-row button bands.
5. Stretchy Bind-off

Bind off the button bands on a right-side row but, this time, don't work any increases at the corners. Use a stretchy bind-off method, especially around those corners. If the bind-off edge is too tight, your button bands will pucker and the corners curl under. Here, I've used Lori's Twisty Bind-off because it works particularly well in any 1×1 ribbing.
After binding off, the top corners can look a little rounded. But we wanted square corners! The last step is to block the button bands so that the top corners form crisp right angles.
6. Pin & Block

Shape the tops of the button bands into right-angle corners with pins. The central column of K1 tbl's should form a diagonal line from the inner corner (teal stitch marker) to the outer corner on the bind-off edge (red pin). Start by pinning the left front (again, wearer's perspective) first.

Use the same pins and overlay the right button band on top of the left, aligning the top corners.

For crisp and square corners with straight edges, let dry completely before removing the pins. And that's it: completed continuous button bands with mitered corners.
To sum up, continuous button bands have all the best features of traditional picked-up bands without the drawbacks: stitches are picked up only once, there are no jarring transitions from neck to button band, and you get square corners at the tops of the button bands.
Once you understand how mitered corners are constructed with paired increases on every other row, the technique is quite straightforward and can be adapted to practically any cardigan with picked-up button bands. I hope this tutorial gives you the confidence to try them in your future projects!
Pin this post!



I cannot tell you how much I appreciate your crunchy, deep-dive explanations and tutorials. I recommend you to all the folks at Sunday knitting at my LYS (and a couple of the staff have followed up). You're up there with Suzanne Bryan for favorite resource (with Roxanne Richardson and Very Pink Knits up near the top, too). Our sweater styles are quite different, but I have a couple of your patterns marked to purchase just because I want to learn the specific technique used in them.... your (not just anyone's) compound raglan being next up on my list. Thank you for all the effort and for sharing so freely. Another post to bookmark!